Shopify integration summary
It is very simple to integrate Size Adviser in a Shopify eCommerce. You only need to follow easy steps and add code in your template.
If you prefer to do the integration yourself, please complete the following steps.
Feed code
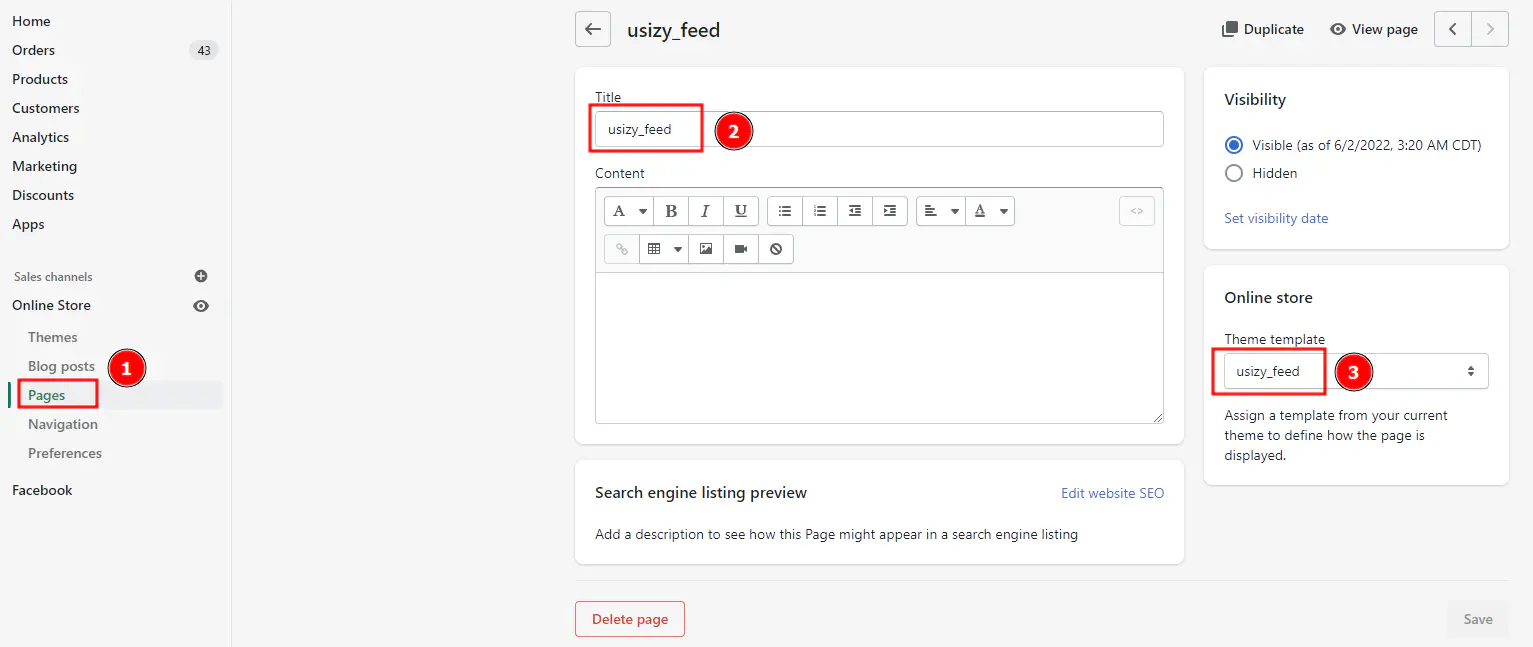
Create a page in your live Shopify template named “page.usizy_feed.liquid”
{% layout none %}id,sku,item_group_id,title,description,brand,size1,size2,product_type,tags,collections,gtin,availability,price,link,image_link,comment
{%- assign collection = collections.all -%}
{%- paginate collection.products by 25 -%}
{%- for product in collection.products -%}
{% for variant in product.variants %}
"{{ variant.id | replace: '"', '""' }}","{{ variant.sku | replace: '"', '""' }}","{{ product.id | replace: '"', '""' }}","{{ product.title | replace: '"', '""' }}","{{ product.description | strip_html | replace: '"', '""' | escape }}","{{ product.vendor | replace: '"', '""' }}","{{ variant.option1 | replace: '"', '""' }}","{{ variant.option2 | replace: '"', '""' }}","{{ product.type | replace: '"', '""' }}","{{ product.tags | join: ',' | replace: '"', '""' }}","{{ product.collections | map: 'title' | join: ',' | replace: '"', '""'}}","{{ variant.barcode | replace: '"', '""' }}",{{ variant.inventory_quantity }},"{{ variant.price | money_with_currency | strip_html | replace: '"', '""' }}","{{ shop.url }}{{ product.url }}","{{ product | image_url: width: 360 }}",
{%- endfor -%}
{%- endfor -%}
{% if paginate.current_page > paginate.pages %}
,,,,,,,,,,,{{ paginate.pages }}
{%- endif -%}
{%- endpaginate -%}
Create a page as illustrated below:
Size adviser product page code
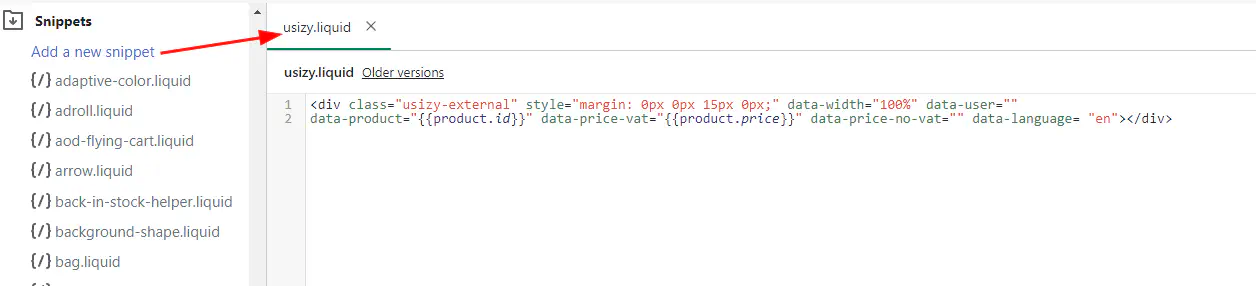
Create a new “usizy.liquid” page in the Snippet section:
Add the following script within the page:
<div class="usizy-external" data-width="100%" data-user=""
data-product="{{product.id}}" data-price-vat="{{product.price}}" data-price-no-vat="" data-language= "en"></div>
Example
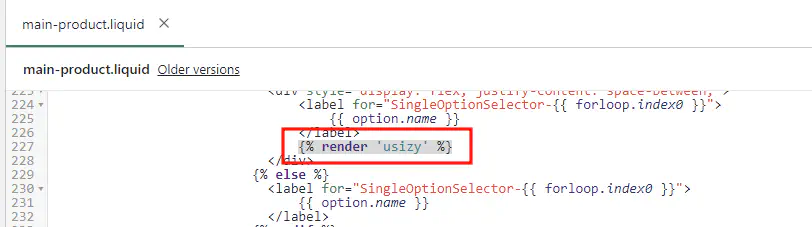
Locate the “.liquid” product page where Size Adviser should appear and include the following code to recall the snippet in the “div” line where you wish to display Size Adviser:
{% render 'usizy' %}
Example
Please feel free to tweak the margin options according to your needs.
API script
Include the following script in your “footer.liquid”, anywhere within a “div”:
<script src="https://static.usizy.es/js/platform.min.js"></script>
Example

Sales conversion code
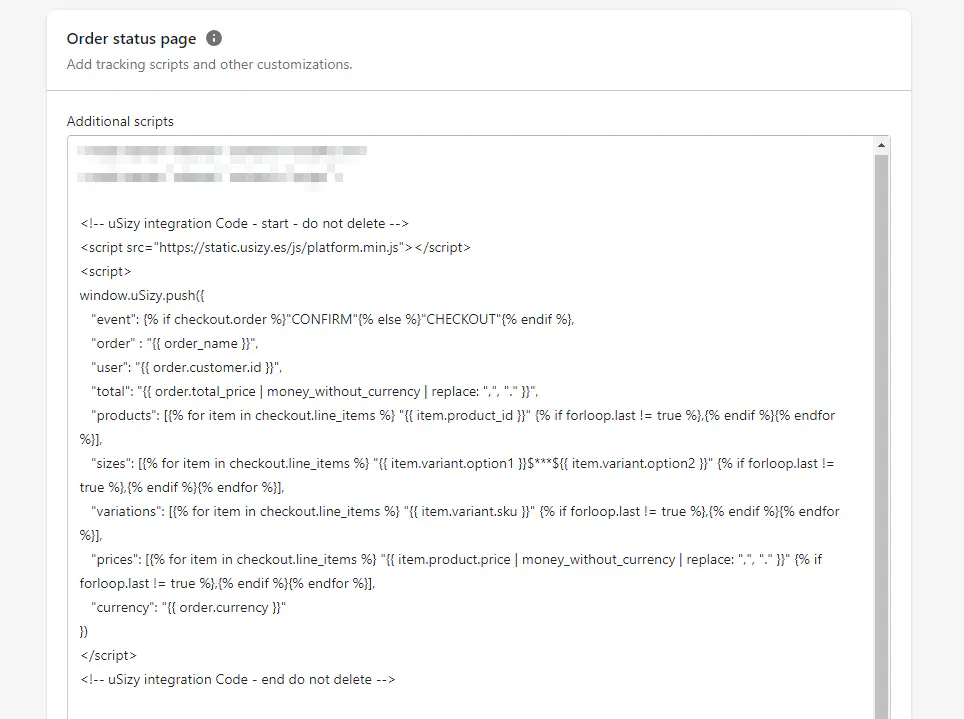
Add the following script into the “Settings \ Checkout” section, in “Additional scripts”:
<!-- uSizy integration Code - start - do not delete -->
<script src="https://static.usizy.es/js/platform.min.js"></script>
<script>
window.uSizy.push({
   "event": {% if checkout.order %}"CONFIRM"{% else %}"CHECKOUT"{% endif %},
   "order" : "{{ order_name }}",
   "user": "{{ order.customer.id }}",
   "total": "{{ order.total_price | money_without_currency | replace: ",", "." }}",
   "products": [{% for item in checkout.line_items %} "{{ item.product_id }}" {% if forloop.last != true %},{% endif %}{% endfor %}],
   "sizes": [{% for item in checkout.line_items %} "{{ item.variant.option1 }}$***${{ item.variant.option2 }}" {% if forloop.last != true %},{% endif %}{% endfor %}],
   "variations": [{% for item in checkout.line_items %} "{{ item.variant.sku }}" {% if forloop.last != true %},{% endif %}{% endfor %}],
   "prices": [{% for item in checkout.line_items %} "{{ item.product.price | money_without_currency | replace: ",", "." }}" {% if forloop.last != true %},{% endif %}{% endfor %}],
   "currency": "{{ order.currency }}"
})
</script>
<!-- uSizy integration Code - end do not delete -->
Example
Sales webhook
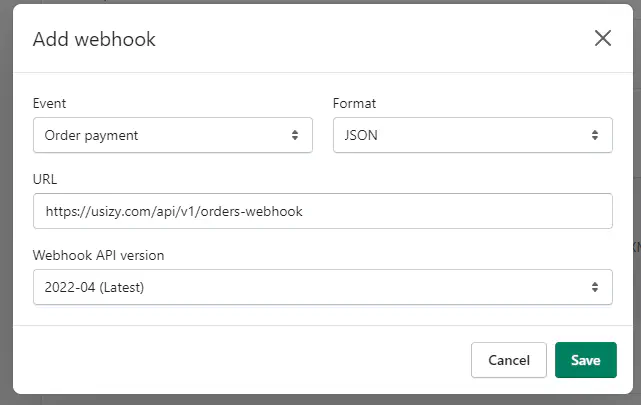
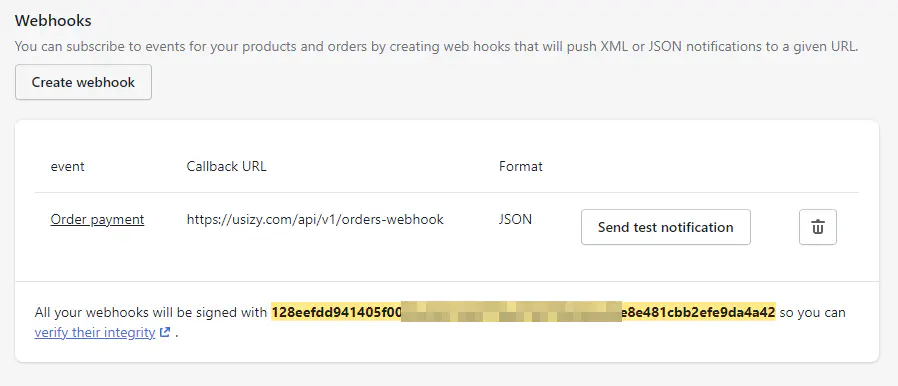
In the Settings/Notifications section, create an Order payment webhook with the following URL (https://usizy.com/api/v1/orders-webhook) as illustrated below:
Send your webhook secret key to Usizy to complete the configuration:
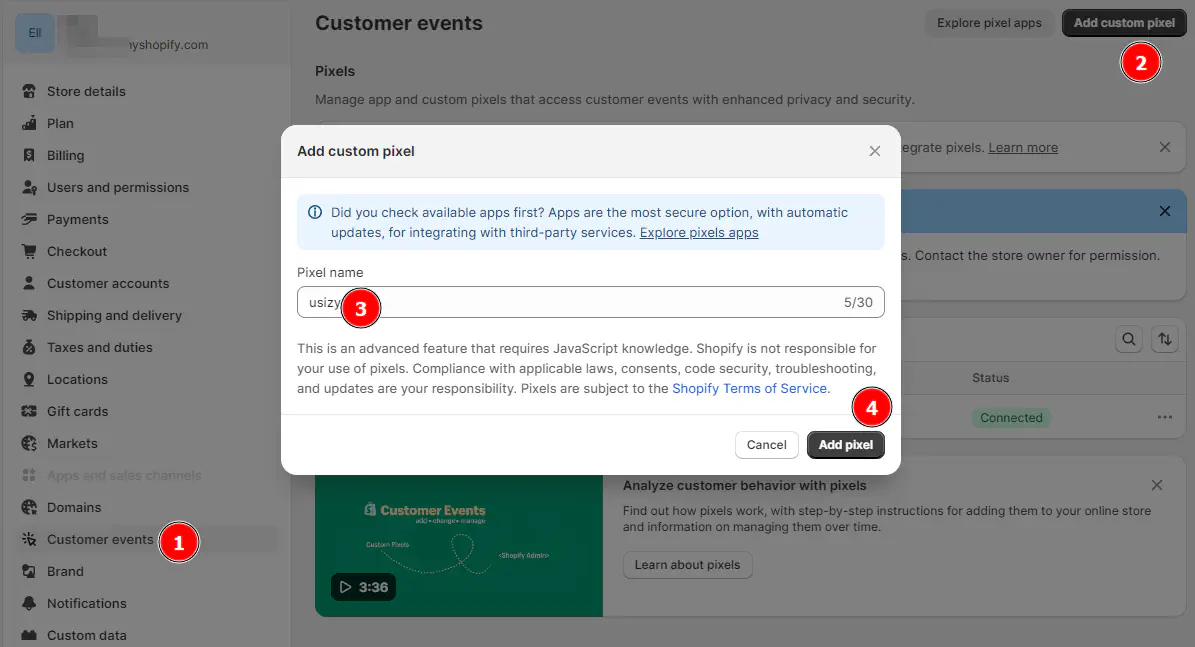
Sales Customer event
In the Settings/Customer events section, click on Add custom pixel named “usizy” as illustrated below:
Copy the following script, save and connect as illustrated below:
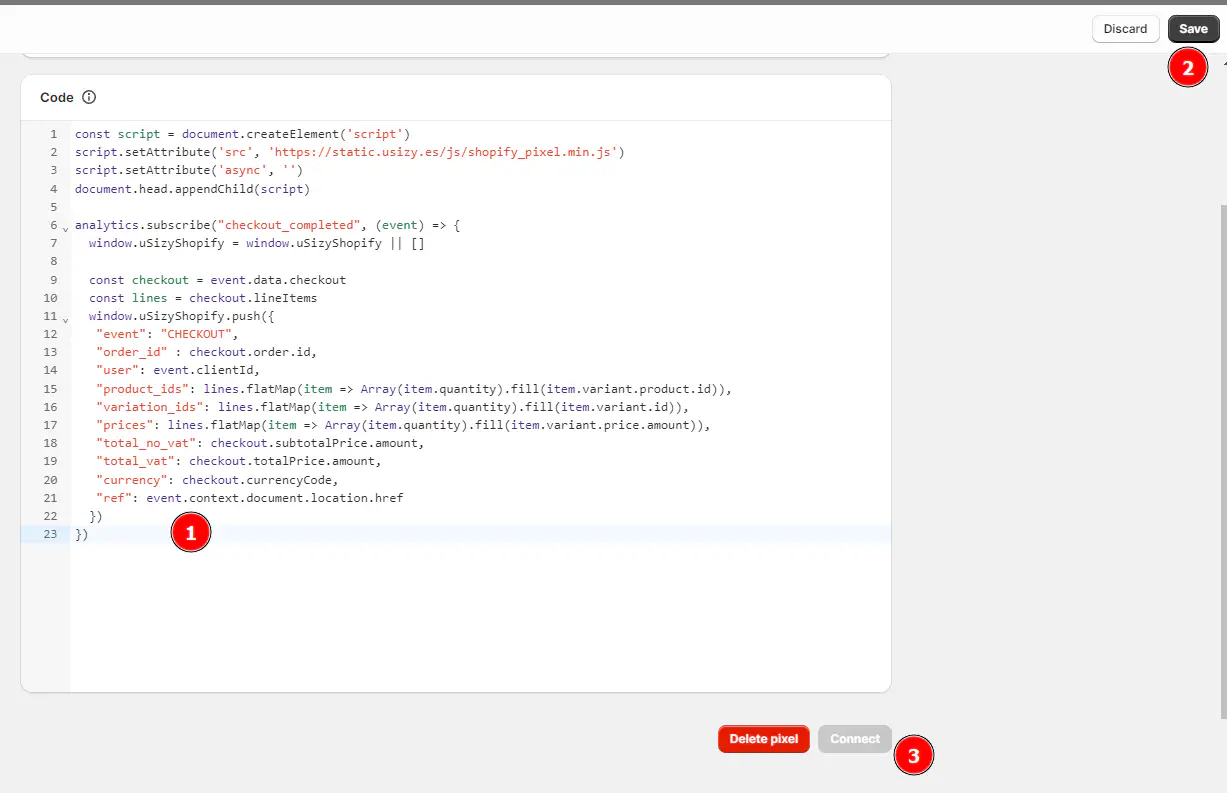
Script:
const script = document.createElement('script')
script.setAttribute('src', 'https://static.usizy.es/js/shopify_pixel.min.js')
script.setAttribute('async', '')
document.head.appendChild(script)

analytics.subscribe("checkout_completed", (event) => {
  window.uSizyShopify = window.uSizyShopify || []

  const checkout = event.data.checkout
  const lines = checkout.lineItems
  window.uSizyShopify.push({
   "event": "CHECKOUT",
   "order_id" : checkout.order.id,
   "user": event.clientId,
   "product_ids": lines.flatMap(item => Array(item.quantity).fill(item.variant.product.id)),
   "variation_ids": lines.flatMap(item => Array(item.quantity).fill(item.variant.id)),
   "prices": lines.flatMap(item => Array(item.quantity).fill(item.variant.price.amount)),
   "total_no_vat": checkout.subtotalPrice.amount,
   "total_vat": checkout.totalPrice.amount,
   "currency": checkout.currencyCode,
   "ref": event.context.document.location.href
  })
})
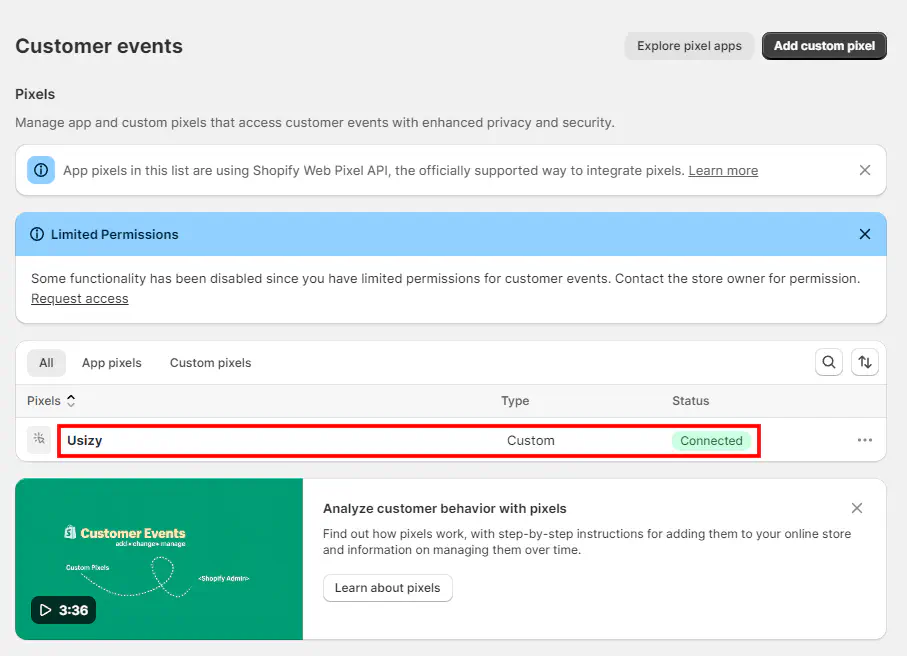
The new custom pixel should appear in the list, as illustrated below:
Returns integration
The returns integration cannot be done natively within Shopify.
Please read the Returns integration section to review the options available for this last part of the Integration with Usizy.